plushiemonkey_64

MakeItGlow
This project is an excerpt from Make it Glow, available in the Maker Shed and at fine booksellers everywhere.

You know your stuffies love you — almost as much as you love them.

Here’s a way to show it!

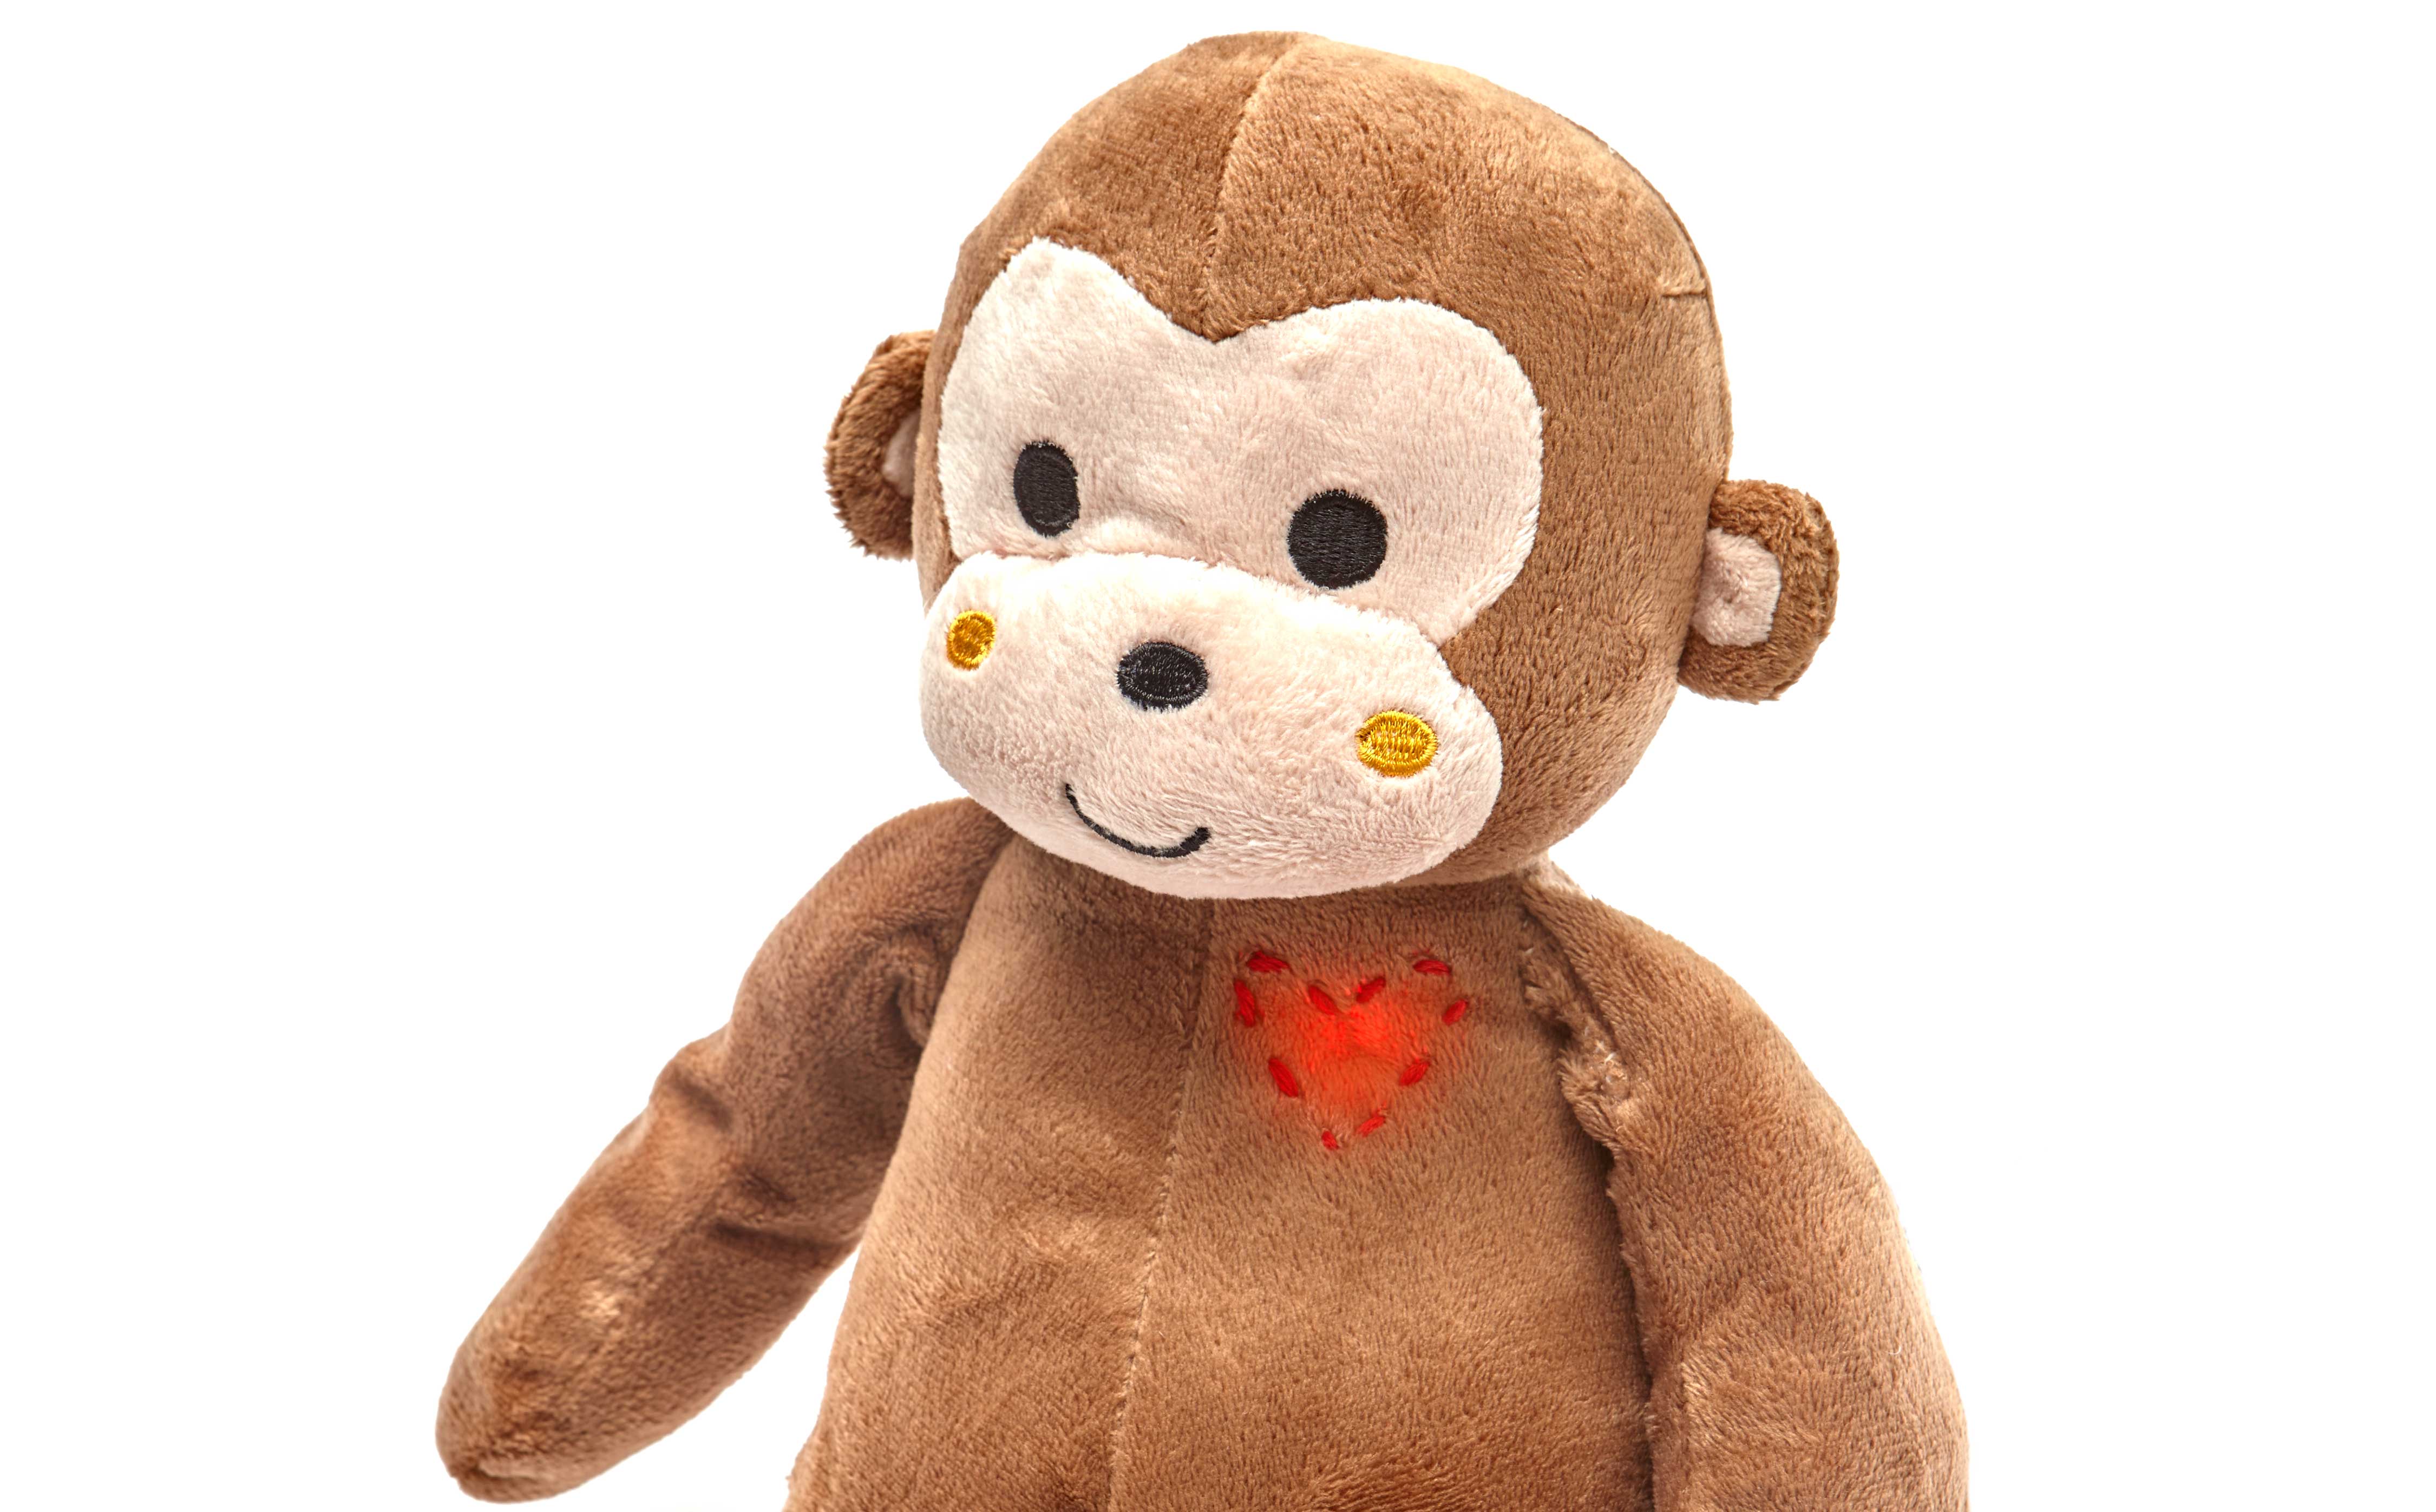
A flashing LED makes a beating heart on the inside, and a few stitches with embroidery thread show the love on the outside.

Project Steps

1. Cut a Hole

Photography by Rory Earnshaw
Figure A. Photography by Rory Earnshaw

With the scissors or craft knife, open a small hole in your stuffie’s arm. Cut along a seam, if you can, so the arm will be easier to sew back together (Figure A). Then feed the head of the tactile switch down into the arm so the leads are sticking out (Figure B). (If you need to remove a bit of stuffing to get the switch in, just stuff it back in when you’re done.)

Figure B
Figure B

2. Cut Another Hole

Figure C
Figure C

Carefully snip another hole in the back of your stuffie (again, on a seam, if possible, Figure C). Using transparent tape, wrap together the ends of the leads sticking out your stuffie’s arm and thread them, like a shoelace, through the stuffie and out the back (Figure D). Set your stuffie aside.

Figure D
Figure D

3. LED

Figure E
Figure E

Mark the long, positive (+) leg of your LED with the black marker. Then gently bend the legs of the LED apart. With the wire strippers, cut a 4″ length of hookup wire and strip about ½” of insulation off both ends. Using the soldering iron, solder one end to the negative (–) leg of your LED (Figure E).

TIP: To make soldering easier, use your third-hand tool to hold the pieces in place, and hold the wires steady with your needlenose pliers when you strip them.

4. Resistor

Figure F
Figure F

With your wire strippers, snip the positive leg of the LED to shorten it (this will keep the wire from flexing and breaking). Twist one end of the resistor (either end will work) onto the shortened LED leg, and solder in place (Figure F). As before, use the third-hand tool to help hold the pieces.

5. Solder to Switch Lead

Using wire strippers, snip one lead of your switch (it doesn’t matter which one) to shorten it about 1″. Then strip that wire, twist it to the resistor’s free side, and solder in place (Figure G).

Figure G
Figure G

6. Cover Exposed Wire.

Wrap electrical tape around both sides of the LED, covering the resistor and all solder points. Use a hot-glue gun to cover the connections on both sides of the LED with glue to prevent breaks and short circuits (Figure H).

Figure H
Figure H

7. Test It!

Hold a battery between the 2 wires to be sure your LED lights up.

8. Set the LED in Place

Figure I
Figure I

Wiggle your fingers inside your stuffie and figure out where its heart (your red LED) should go. Use a pencil or piece of chalk to mark the spot inside, so the mark doesn’t show through to the front. Using the hot-glue gun, put a blob of glue there, wait until it’s tacky, and then set the LED in place, right up against your stuffie’s chest. Hold until dry (Figure I).

NOTE: If you need more hands to hold the stuffie while placing the LED, ask a friend to help!

9. Sew a Heart (optional)

Figure J
Figure J

If you want, as a guide while sewing, use a pencil to draw a heart shape on the outside of your stuffie, around the LED. Then, thread a needle with doubled-up red embroidery thread. Start from the inside so you can hide the knots, and carefully stitch a heart around the LED on the outside of your stuffie’s chest (Figure J).

10. Sew up the Arm

Use sewing thread and a needle to sew up your stuffie’s open arm. Knot and cut the thread.

11. Sew up the Back

Figure K
Figure K

Use sewing thread and a needle to sew up your stuffie’s back. Sew around the wires, leaving them sticking out, and leave an opening of about 1″ so you’ll always have access to the battery (Figure K). Be sure to knot and secure the threads above and below the opening.

12. Wire the Battery

Hold or temporarily tape the battery between the 2 wires. Does the LED light up on the front of your stuffie? If not, switch the battery around. When the LED lights up, note which wire is against the positive (+) side of the battery and which is against the negative (–) side. That will tell you how to orient the battery holder (Figure L).

monkey_3-1
Figure L

13. Make Sure it Works

Twist the wires into the battery holder, top and bottom, connecting positive (+) to positive (+) and negative (–) to negative (–). (On our monkey, the top wire was the positive wire.) Slip in the battery to be sure the LED is working. When everything is oriented correctly, reinforce both joints. Using the soldering iron, solder the wires in place, and using the hot-glue gun, cover them with hot glue. Then carefully stuff the battery and battery holder into the opening.

14. Make Battery Access

Using a needle and sewing thread, sew one half of the snap in the center of the small piece of felt, and the other half of the snap centered at the edge of the large piece of felt (Figure M).

Figure M
Figure M

15. Finish it up

Figure N
Figure N

15. Using the hot-glue gun, glue the small piece of felt (snap side out) on one side of the 1″ opening (Figure N). Then, making sure the 2 halves of the snap align, glue the edge without the snap of the larger piece of felt to the other side of the opening (Figure O).

Figure O
Figure O

Fold to snap the 2 halves together (Figure P).

monkey_7-1

Press the tactile switch in your stuffie’s arm to turn on its beating heart (Figure Q), and give it a heartfelt hug. Surgery successful!

monkey_1