Cover of Make Volume 96. Headline is "Tech Craft". An embroidered LED phone purse and inflatable Katamari costume are on the cover.
This project appeared in Make: Vol. 97. Subscribe to Make: for more great projects.

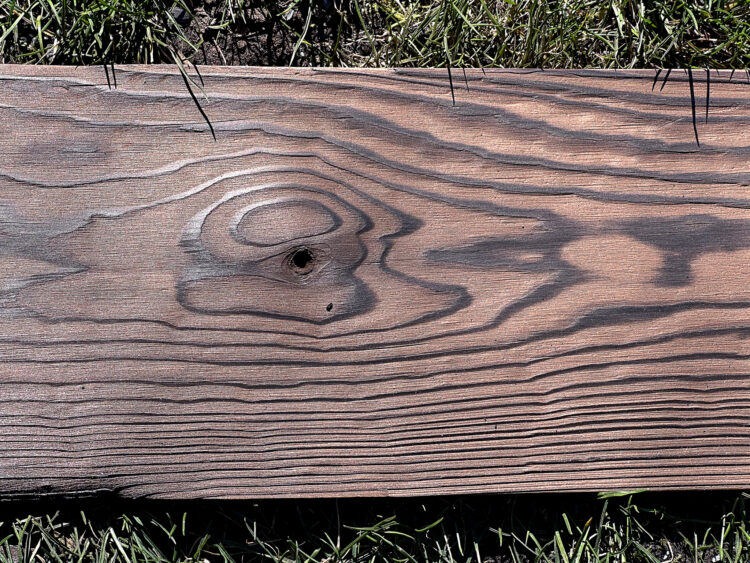
Yakisugi is a traditional technique originating in western Japan more than 400 years ago. It is the process of deeply charring the surface of cedar boards to make them less susceptible to fire, bugs, rot, and UV damage from sunlight. These boards were used almost exclusively for siding buildings, for fences, and occasionally ceilings. The effect is pretty dramatic, especially when covering large surfaces.

The name yakisugi (焼杉) derives from two Japanese words: yaki (焼) meaning burned, charred, or broiled, and sugi (杉) referring to a Japanese cedar tree, Cryptomeria japonica. (Yakisugi is sometimes incorrectly called “sho sugi ban,” based on a mistranslation of the kanji characters in the U.S. media. No one in Japan calls it that; sho sugi ban isn’t even a word.)

Making Traditional Yakisugi Siding Boards

There are two basic ways to make yakisugi siding:

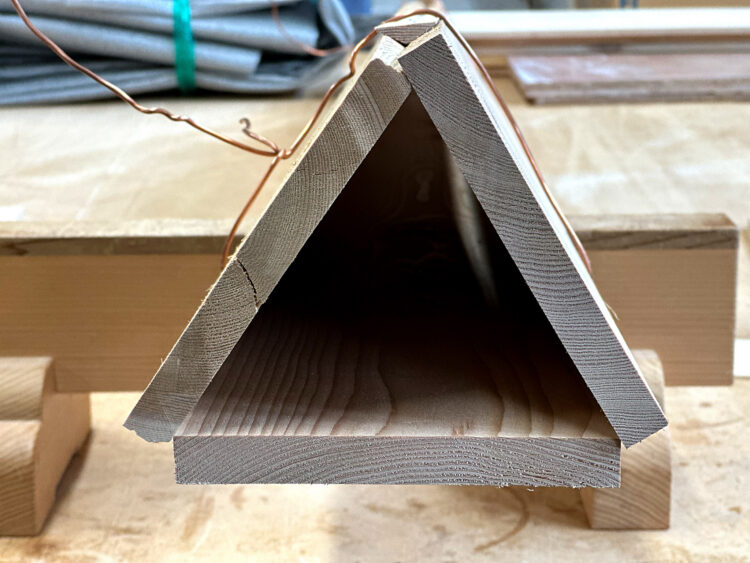
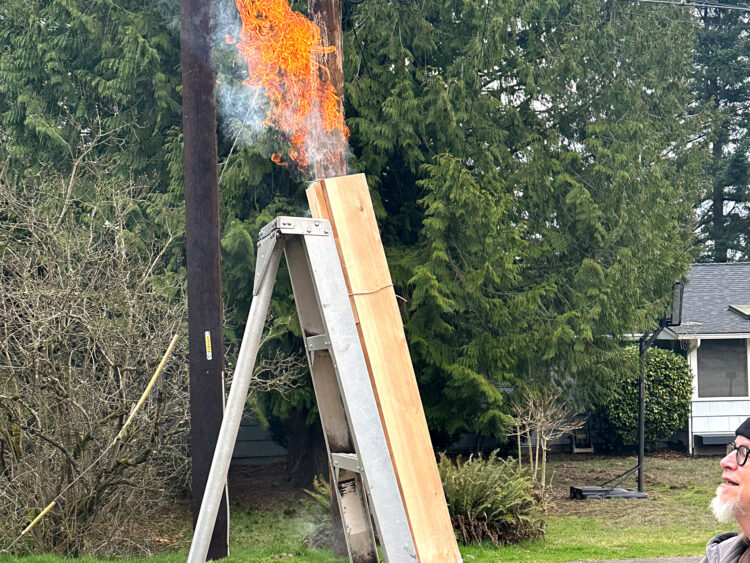
  • The traditional way of making a triangular chimney.
    • Pros: Fast! Exciting! Dramatic! Deeply charred surface.
    • Cons: Dramatic! Smoky! Neighbors might not like it! Fire trucks!
  • The weed torch method.
    • Pros: Not as smoky, neighbors might not even notice.
    • Cons: Slow, doesn’t char as deeply, requires propane and a big torch.

Because the weed torch method is pretty self-explanatory — lay the board on the ground and pass a torch over it until it is burned to your liking — I’ll demonstrate the traditional method.

COMMON SENSE WARNING:

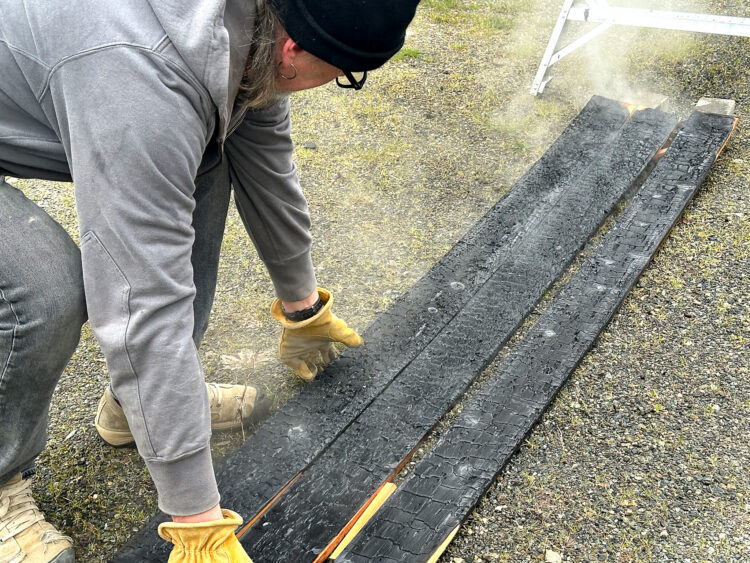
Do not attempt this project during fire season, on a windy day, or near flammable flora, fauna, or structures. Wear protective gear and have a working, turned-on hose at the ready. It is also a good idea to have a helper present, not only to help getting the boards wired together and to be ready with the hose if needed, but also to take all the pics and video you’ll want of this.

Project Steps

1. Plane Boards

Using three rough-sawn 1″×6″×8′ cedar boards, I start by planing them to 15mm (9/16″), which is partially to get them down to the common siding thickness, and also to get the surface clean and smooth. Even though it’s going to be burned, damage and defects can telegraph through the char, particularly if you’re planning to finish with a brushed surface.

2. Bind in a Triangle

Next I’ll orient them into a triangle, bark side in. Using two bare copper wires, I hold them together near the top and bottom with a single twist. Multiple twists of the wire will make it difficult to open it quickly. Be careful of the wire, as it is quite pokey and fond of eyes.

Images and photography by Len Cullum

When assembled, the boards will want to overlap each other at the corners, leaving some of the surface uncharred, so on this demo I played with a couple of shim shapes to try to keep the faces fully exposed to the flame. It worked to a certain extent, but binding the boards without them is easier.

Since yakisugi siding would typically be installed vertically using a board and batten technique, unburned edges would be covered by the battens. If you’re planning to use the boards in an open siding or horizontal manner, the missed areas and sides can be touched up with a torch afterward.

3. Char

To start the burn, I take the chimney to an open area, put it up on bricks, and lean it against an all metal ladder. I then stuff a loosely balled sheet of newspaper into the bottom and light it. It doesn’t take long for crackling sounds to start and smoke to emerge from the top.

Now we wait as the flames climb the inside of the chimney at an alarming speed. After about 2 minutes, flames will start to jet out of the top. Sometimes the burnt remnants of the newspaper will shoot out too. Be ready.

4. Douse

After 4–6 minutes the boards should be charred sufficiently (these went for 5:30). Wearing fire-resistant gloves, I lay the chimney down and spray water in the ends to douse the flames.

(Some people just tip it and let it fall, but I prefer not to damage the char.) Then I untwist the wires, lay boards flat, and spray again.

5. Brush (optional)

If an exposed grain look is preferred, after allowing the boards to dry overnight, I use a plastic-bristled deck brush to scrub the char away.

Conclusion

And there you have it, yakisugi! Some people will apply a finish to the surface to try to lock the color and surface into some kind of permanence, but I prefer to go with the old method of letting it age naturally, and appreciating what it becomes with time. Letting it show the signs of having existed, like all of us do.

While a huge wall of yakisugi is really cool, most people probably won’t have a chance to do a whole building of siding, so let’s use yakisugi in a couple of small projects: a sakura sconce and a display stand.


This project appeared in Make: Volume 97.