Forrest M. Mims III (forrestmims.org), an amateur scientist and Rolex Award winner, was named by Discover magazine as one of the “50 Best Brains in Science.” His books have sold more than 7 million copies.
Figure 2. Photo by Forrest M. Mims III / Hep Svajda.
Model rockets and toy projectiles sent aloft by rubber bands or latex tubing are loads of fun. While model rockets are best for high altitude, you can have plenty of fun launching inexpensive projectiles equipped with a steady-state or flashing LED and flown at night. You can stage competitions to see how far various designs can travel. And you can do some real science by recording their flights with a time exposure camera to study flight stability, spin, and speed. Let’s get started with an ultra-simple projectile launched with a slingshot. To make this yourself, it is going to cost about $10 to $35 and take just an evening to complete.
Hobby Lobby stores sell a package of a dozen miniature white LEDs installed in tiny metal cylinders equipped with a battery and rotating switch. These bullet-shaped lights are ideal for use as tiny inertia projectiles launched from a slingshot at night. They can be launched as-is or stabilized by taping one end of a broom straw, 6″ long or so, to the LED fixture so that it resembles a miniature bottle rocket. Switch on an LED and place it (or two of them) in a slingshot pocket (Figure 1). If a broom straw is attached, it should point straight up so it won’t hit the slingshot fork. Then fire the projectile into the air from a grassy field.
Air resistance has very different effects on these tiny projectiles. The unmodified LED will tumble in flight, while a broom straw version will usually provide a more stable flight. However, the bare LED sometimes reaches a higher altitude than the broom-straw equipped LED. This can be seen in the time exposure in Figure 2 of a bare and straw-equipped LED simultaneously launched by the same slingshot. The bare LED reached 102.6 feet and the straw-stabilized LED only 90.8 feet. The altitude was determined by using the known height of the adjacent tower illuminated by a flashlight as a reference.
You can have lots of fun with these micro rockets while doing some real science. For example, what’s the minimum length of the straw for stable flight? What’s the maximum distance covered by launching micro-rockets at an angle? How high can they travel? Why does the bare LED travel as high or higher than the straw-stabilized LED and why is its tumble so regular?
You can also organize competitions to see whose micro rocket covers the most distance or lands closest to a target on the ground. Paint the LEDs with different colors and leave them glowing in the field until all the competitors have completed their flights.
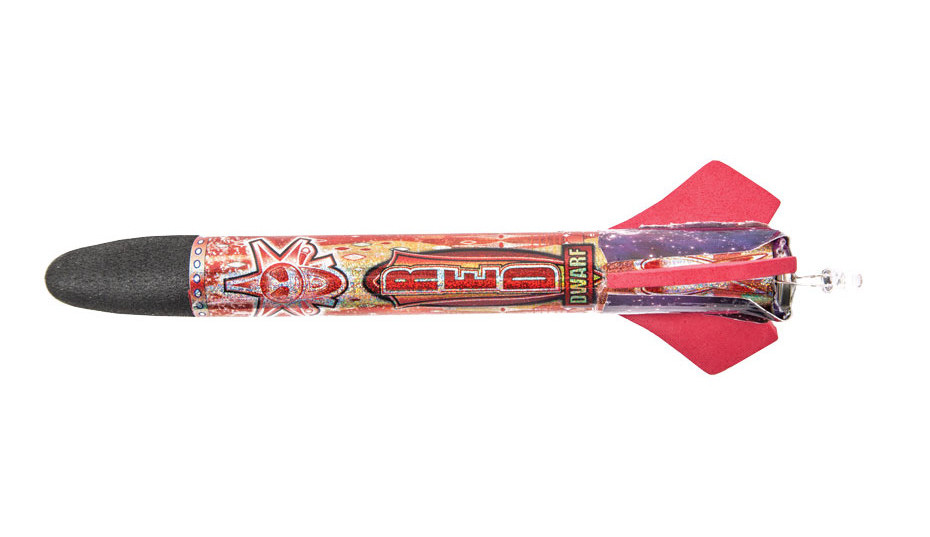
During a recent visit to the White Sands Missile Range Museum, I purchased a package of three Sky Rockets made by Monkey Business Sports. These “High Flying, Hand Launched, Foam Rockets” are sent on their way by a handheld elastic launcher. If you flick your wrist forward while releasing the rocket, it can reach an altitude of 300 feet.
Figure 3Figure 4
It’s easy to equip a Sky Rocket with a tracking light. Tape the leads of a white LED across opposite sides of a lithium coin cell so that the lead on the flat side of the LED is on the negative side of the cell (Figure 3), and tape this assembly to the back end of a rocket (Figure 4). (Optionally, add a simple on-off switch using a paper tab, as shown in Step 3 of Extreme LED Throwies.)
To study roll rate, insert a Hobby Lobby LED into a hole made in the side of the rocket at its center of gravity (balance point) and secure it in place with clear tape (Figure 5). The time exposure in Figure 6 shows a typical flight, with the rocket’s rotation clearly indicated by streaks of light. The streaks are longest during the early stage of flight when the missile is moving fastest. The ground streaks at right are from my flashlight as I walked to the launch site.
Figure 5Figure 6
For a tracking light that flashes, I’ve not found anything better than Coghlan’s Brite Strike APALS, an ultra-thin, lightweight rectangle measuring 1″×2″ that is easily stuck to the side of a rocket and secured with clear tape. The time exposure in Figure 7 shows the apogee of a flight neatly outlined by this red flasher.
Digital cameras are ideal for recording the flight path of night-launched rockets and inertia projectiles equipped with a tracking light. The flight paths in Figures 2, 6, and 7 were photographed with a Canon 7D set for an ISO of 6400. The lens was a 20mm–40mm wide angle. The camera was mounted on a tripod 150 feet from the launch site.
For early flights I set the exposure time to 30 seconds, tripped the shutter, ran to the launch site, and launched the rocket using an elastic-powered hand launcher or slingshot. After falling down during one night session, I began triggering the camera with a radio-controlled actuator, which greatly simplified the launch protocol. After the camera was set for a 10-second exposure, I walked to the launch site, pressed the transmitter button and launched the rocket.
The altitude reached by your rockets can be determined by including an illuminated object of known height in each photo. Dark nights with few or no clouds are best.
Conclusion
The sky’s the limit with this project. You can easily build your own inertia projectiles using paper or plastic tubes equipped with paper fins and a foam nose from a toy missile or a miniature paint roller. Figure 8 shows one I’ve built and launched with a homemade launcher made by attaching a loop of neoprene tubing to a handle. Night tracking would also be fun with water rockets (makezine.com/projects/soda-bottle-rocket), compressed-air rockets (makezine.com/projects/high-pressure-foam-rocket), and other DIY rockets and projectiles.
SAFETY PRECAUTIONS: As with any project involving projectiles, use common sense. Children should be supervised. Rockets should never be launched toward people or structures and should always be launched from a field. Wear clear safety glasses when launching elastically propelled rockets. Inspect the field during daylight to check for potential safety hazards. During night launches, all participants should have a flashlight. I wear a headlamp to keep my hands free.
Forrest M. Mims III (forrestmims.org), an amateur scientist and Rolex Award winner, was named by Discover magazine as one of the “50 Best Brains in Science.” His books have sold more than 7 million copies.
When you buy through links on our site, we may earn an affiliate commission.
Our websites use cookies to improve your browsing experience. Some of these are essential for the basic functionalities of our websites. In addition, we use third-party cookies to help us analyze and understand usage. These will be stored in your browser only with your consent and you have the option to opt-out. Your choice here will be recorded for all Make.co Websites.
Allow Non-Necessary Cookies
Escape to an island of imagination + innovation as Maker Faire Bay Area returns for its 15th iteration!
Buy Tickets today! SAVE 15% and lock-in your preferred date(s).